So something I've wanted to work on for awhile has been creating some pouf ottomans for extra seating and to put our feet up! Living in a small apartment, it's hard to add seating without crowding the space. So a week or two ago my husband brought home these fantastic coffee bags from his work. I totally fell in love with the stamps on them and thought they could add a cool, rustic element to our living room.


As an aside, I'm discovering more and more that I can't seem to decide whether I prefer a more bohemian style, or a more classic, refined style--so I seem to keep meshing them together. I'm not sure it always works--but I actually think this does!
My original plan was to actually make round poufs out of an old sheet, stuff it, and then cover the sheet pouf with the burlap. A lot of time and work was going to be involved!
This was my original inspiration picture...
This was my original inspiration picture...
I was walking through Target the other day and found these hideous square pouf ottomans, but felt like I had struck gold! They were only $12 each!! That's less than it would cost to buy all the stuffing/foam I would have needed to make it myself. So I snatched two of them up!
So once I got them home, I measured out each panel and then mapped out the cuts on my coffee bags. At that point, I ripped out the seams on the bags--I had to be careful not to fray the burlap too much so that I didn't loose any material. It was a VERY messy process--so it you undertake this project, be ready with a vacuum!!
Once I had the 4 separate sides of the bags apart, I cut out the panels. I had 3 more "plain" sides which I used as the bottom and side pieces (10 total panels). I had a 1 really interesting panel--so I used that to just do the top panels for each ottoman.
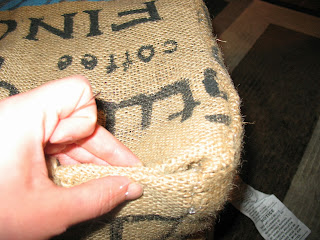
I chose to use fishing line to sew the panels together because I wanted to make sure it was going to hold when people sat on them. I also doubled up on the fishing line when sewing (no picture because it's clear!) I sewed together the 4 side panels first--I sewed each seam twice, each time by hand, to make sure that the seams would hold. It was fairly quick and easy, I used a big embroidery needle so it was easy to thread and everything. The hardest part of the side panels was to make sure I sewed the seams tightly and in a way that wouldn't fray the burlap!
This is 4 panels sewn together. Then I sewed the two ends together and slipped it over the pouf. I did it this way because I wanted to make sure to fit the bottom and top correctly.
I placed the top/bottom panels and then sewed the seams all the way around, twice. The trickiest part are keeping the seams straight as you sew and the corners. But you just have to sew around it and use pins to place the fabric where you want it as you sew.
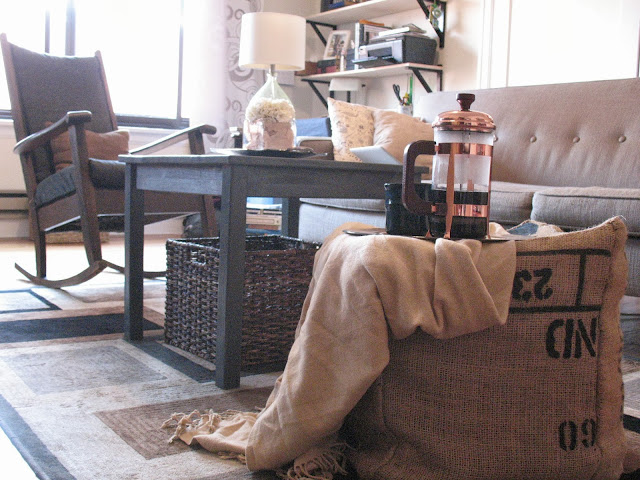
Once all the seams were sewn I got to clean up and then place them in our living room!!
Love how comfy it makes our living room feel!!
What do you guys think of my new poufs? How do you mix styles you love?!
Places I linked up this week--make sure to visit them all!


 />
/>


I love these, and think you did a fantastic job! GREAT buy on the ugly Target poufs too. I have used coffee bean bags before and you're so right about the mess. I'm thinking of recovering my ottoman but I might wash them first. Thanks for the tutorial:)
ReplyDeleteThanks! I probably should have washed them first, I always get too excited and get halfway into my project and then think it all the way through! haha Good luck recovering your ottoman, can't wait to see how it turns out!
DeleteSO cool! You did such a good job! Wish my husband would come home with some awesome bags like those. ;)
ReplyDeleteLOVE your poufs! What a great way to dress up those unfortunate looking ones you found from Target. Absolutely beautiful! Just wanted to let you know that I've chosen this post as my feature today over at Huckleberry Love. Be sure to stop by and grab our "I Was Featured" button to display on your page!
ReplyDeleteThanks for linking up with us at Much Ado About Monday. Have a great weekend! :)
~Emily
www.huckleberrylove.com
Wow, thank you so much! Have a wonderful weekend!
DeleteThese are so fun! I am always mixing styles, and I think these are a great option for small spaces. Thanks for sharing at Give Me the Goods. :) Please remember to add a link back so you could be featured in the future.
ReplyDeleteRachel @ www.maisondepax.com
Thanks!! New at this whole blog thing--finally figured out how to link back, thanks for the reminder!!
DeleteWhat a great idea to use the ugly Target poufs for your stuffing!! I love how they turned out!
ReplyDeleteTania